
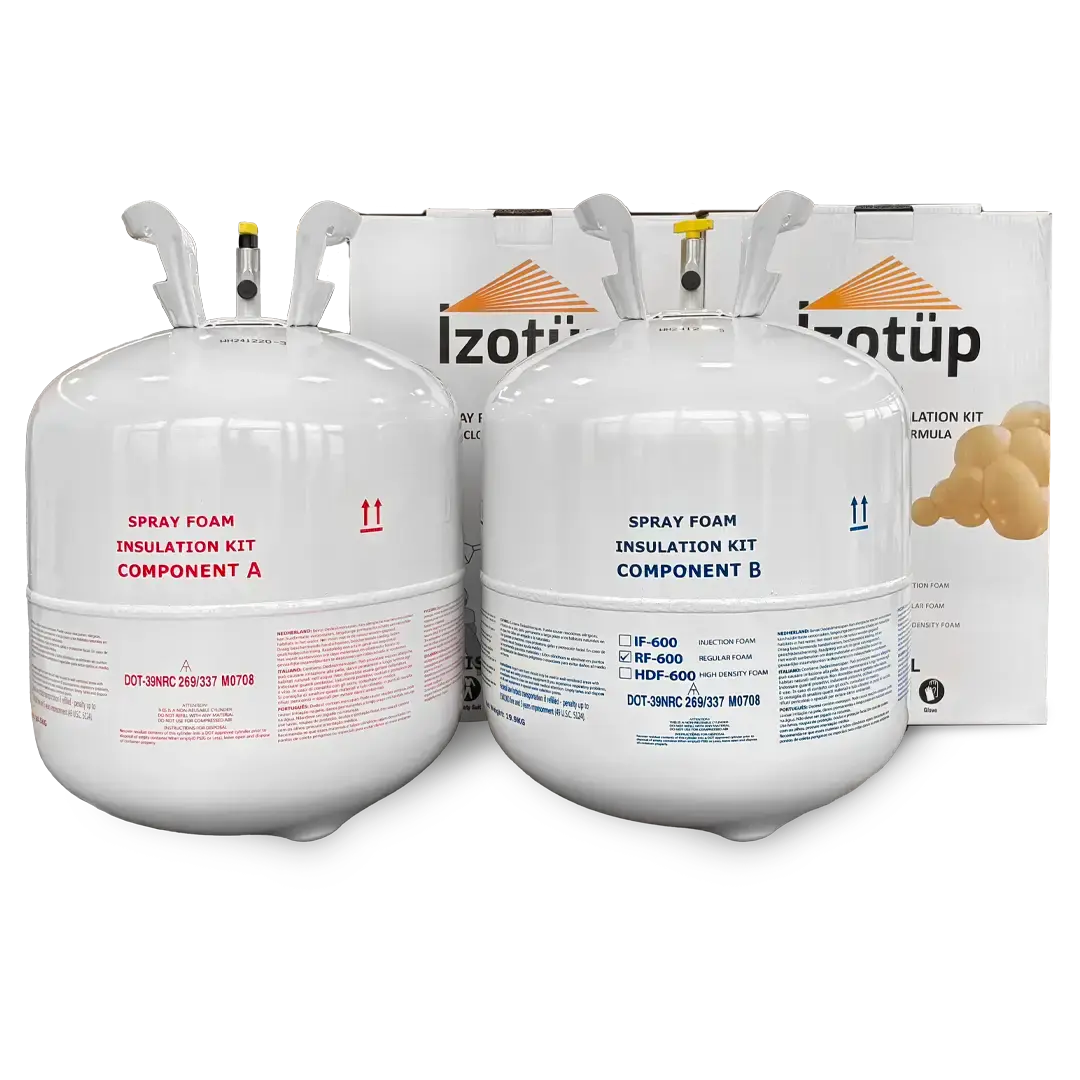


Isotope 600-E Injection Kit (1m³)
Regular price
21,000.00TL
Sale price
21,000.00TL
Unit price
per
Tax included.
Shipping calculated at checkout.
999 in stock
Couldn't load pickup availability
İzotüp 600-E Injection Polyurethane Kit (1m³)
Professional insulation and structural support for large volume cavities.
İzotüp 600-E is a portable and high-performance injection system for large-scale insulation projects.
- Filling Capacity: A single kit has the power to fill a full 1 m³ volume.
- Areas of Use: Industrial tank insulation, large ship/boat compartments, double-walled prefabricated walls, sub-foundation void filling, and large-scale insulation panels.
- High Insulation: Provides industrial standard thermal protection and sealing with an R-6.2 value.
- Advantage: Requires no heavy machinery or electrical connections. Provides ease of mobile use on-site; performs professional filling with a plug-and-play system.
Application Instructions
1. Gun and Nozzle Preparation
- Use of Petroleum Jelly: Before attaching the nozzle, apply a thin layer of petroleum jelly to the tip of the gun. This prevents hardened foam from damaging the gun and makes cleaning easier.
- Full Locking: When attaching the nozzle to the gun, ensure it is fully seated and locked. If the nozzle is not fully seated, the material may back up into the gun, rendering the equipment unusable.
2. Initial Start-Up (Test Spray)
- Before proceeding with the injection, perform a small test spray into the product box or an empty waste container.
- Why? You must check that the two components (A and B) are flowing evenly from the hoses and mixing correctly in the nozzle. You are ready for injection when you see that the color and consistency are stable.
3. Application and Filling Technique
Polyurethane injection application prevents voids by pushing the air inside outwards as the material progresses.
Determining Hole Spacing
- Horizontal and Vertical Spacing: Drill holes on the surface you will be applying to (wall, tank, boat hull...) at intervals of 30 cm to 50 cm.
- Hole Diameter: Use a drill bit of appropriate diameter (usually 10-12 mm) to ensure the nozzle tip fits snugly and creates a seal.
- Air Vent: Always leave a "vent hole" at the highest point. This allows air to escape as the material rises.
Application Order (Bottom-Up Method)
- Start from the Lowest Point: Due to the principles of gravity and expansion, always start the injection from the lowest or outermost hole.
- Observation and Transition: When the polyurethane foam begins to overflow from the hole above or next to it in a "creamy consistency", that area is filled.
- Sealing: Temporarily close the overflowing hole with a plug or your finger (using a glove) for a short time, and immediately move to the next hole to continue injecting.
- Break Time: Do not pause the process for more than 30 seconds. If there is a pause, the material inside the nozzle will harden; in this case, a new nozzle must be attached.
- Continuous Progress: Repeat this process until material emerges from the top vent hole.
